
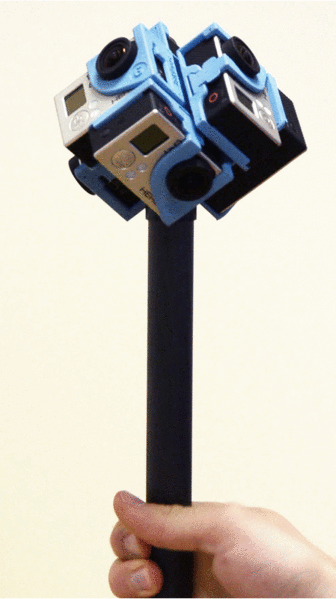
Filming
When shooting with the H3Pro7 360 Plug-n-Play Holder, there are several factors to consider. The video settings for the 7 GoPro cameras must be set at the following:
- Wide
- 1440
- 48 frames per second*
*You could use another frame rate but you want the cameras to sync as close as possible.
Sync the goPro cameras via the goPro wifi remote so they start to record when turned on. Here are instructions on syncing one remote with the 7 cameras.
Place the rig so it is straight up and down to eliminate the rig showing. (If there is a lot of motion close to the camera, the rig can be placed so there are more cameras on the horizon line to eliminate the parallaxing caused by the overlap of cameras. Also an adjustment will need to be made to pano to create a flat horizon when stitching the videos)
At the start of filming rotate the cameras to sync cameras on motion:
Exporting
When you are finished shooting, it is important to have an organized process for importing the videos. You cannot name the video files in the GoPro, so you need and organized file structure to place the videos in the correct order.
Import the footage one camera at a time starting with camera one. Place these video files in a folder named “Camera 1”, etc.
You then need to create a separate file for each video. Copy and paste the corresponding video from each camera folder into the video file. After the file has been copied over, rename the file by the camera number, i.e. “Camera1”.
Previous Process:
This page will explain our current process on creating 360 video. This will continue to be expanded on as we improve our process.
Next the cameras need to be oriented so the level with the horizon. In order to do this, the rig has to be placed at a 45 degree angle.

If the tripod mount is straight up, the footage will spin in the video player instead of panning left and right.

footage shot with tripod mount perpendicular to horizon
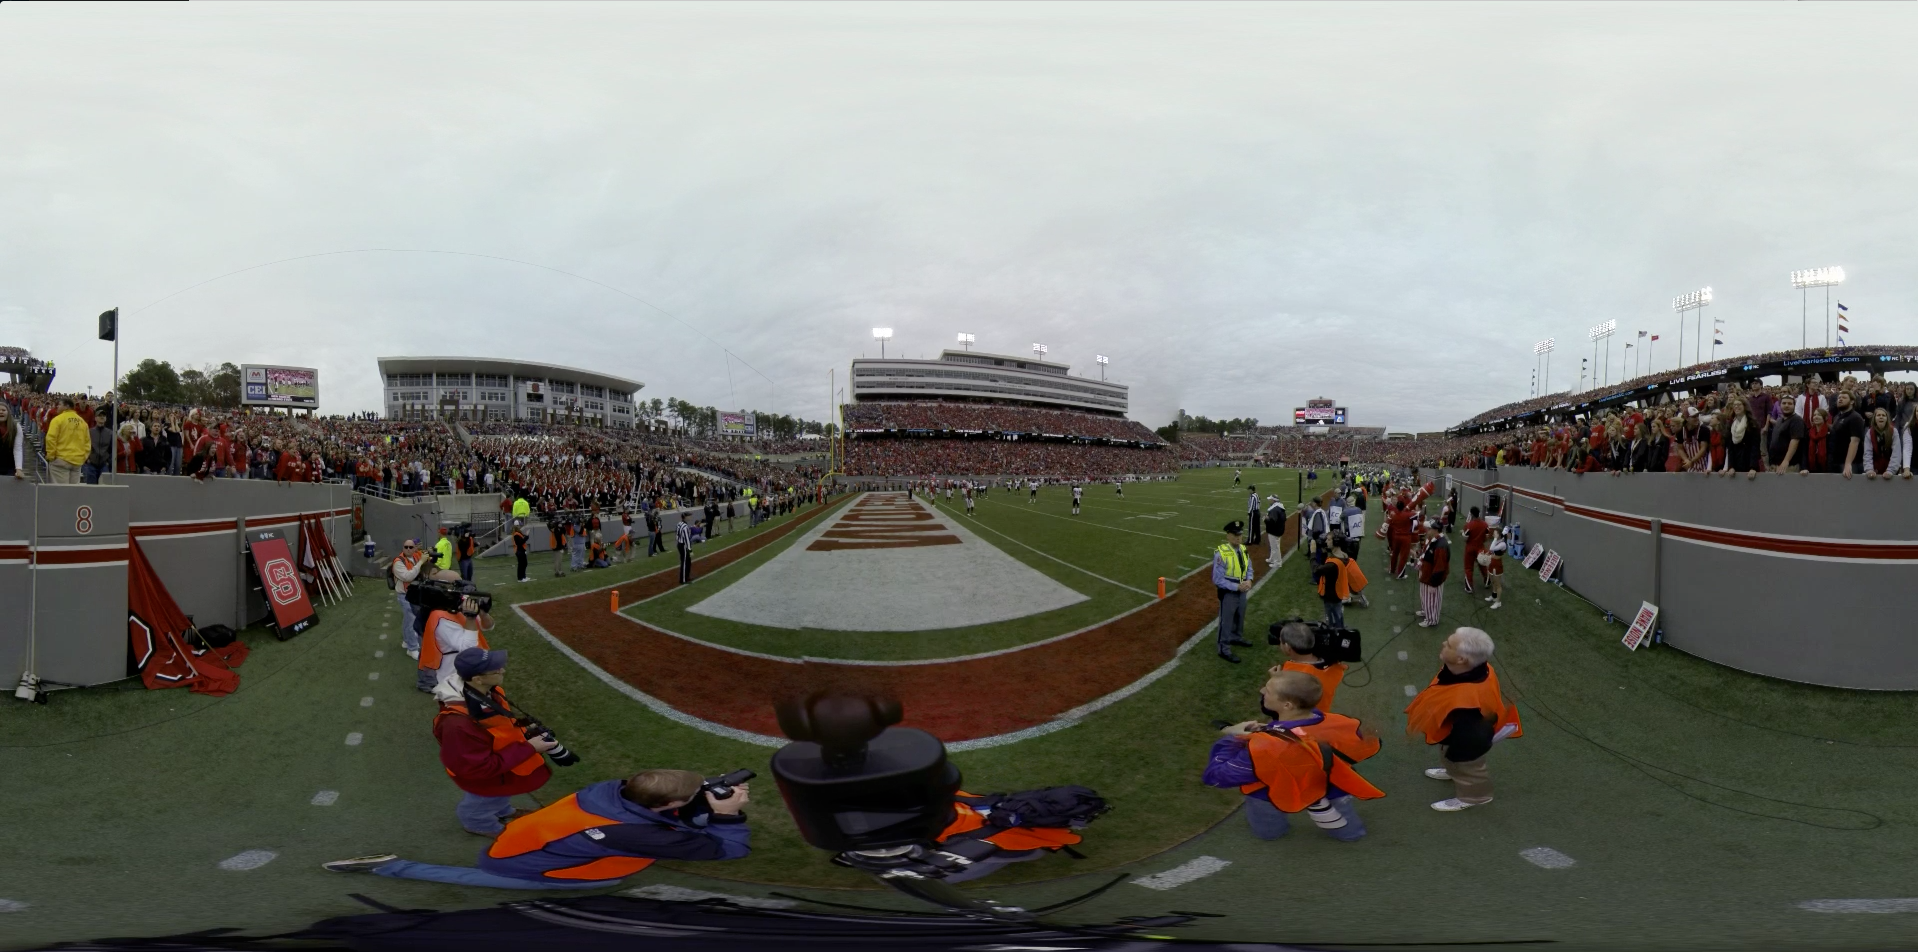
footage shot with tripod mount at 45 degree angle
After tripod has been setup, turn on camera with the remote. Then snap or clap close to the camera. This will create an audio cue for VideoStitch to sync the 7 videos with.
Exporting
When you are finished shooting, it is important to have an organized process for importing the videos. You cannot name the video files in the GoPro, so you need and organized file structure to place the videos in the correct order.
Import the footage one camera at a time starting with camera one. Place these video files in a folder named “Camera 1”, etc.
You then need to create a separate file for each video. Copy and paste the corresponding video from each camera folder into the video file. After the file has been copied over, rename the file by the camera number, i.e. “Camera1”.
Rendering
After you have the seven video files in the video folder, you can drag and drop the files into Video Stitch.

Select all videos and drag and drop here

Videos will appear like this
Now you need to sync the videos so they will all be playing at the same time.

sync videos
To sync videos, press “synchronize” and then “Compute offsets.” The start point should be 00:00:00 and the end point should be 00:15:00 to sync off of the snap at the beginning of the video shoot. If you notice one or more cameras are off by more than 40 frames are so, you forgot to snap, or filmed in a noisy environment where the snap was not registered, you may want to adjust the start and end points until the videos seem to sync in a close proximity.
Next we apply the calibration template which will stitch the videos together based on the 7 camera 360 video holder. This template comes with the purchase of the video holder.
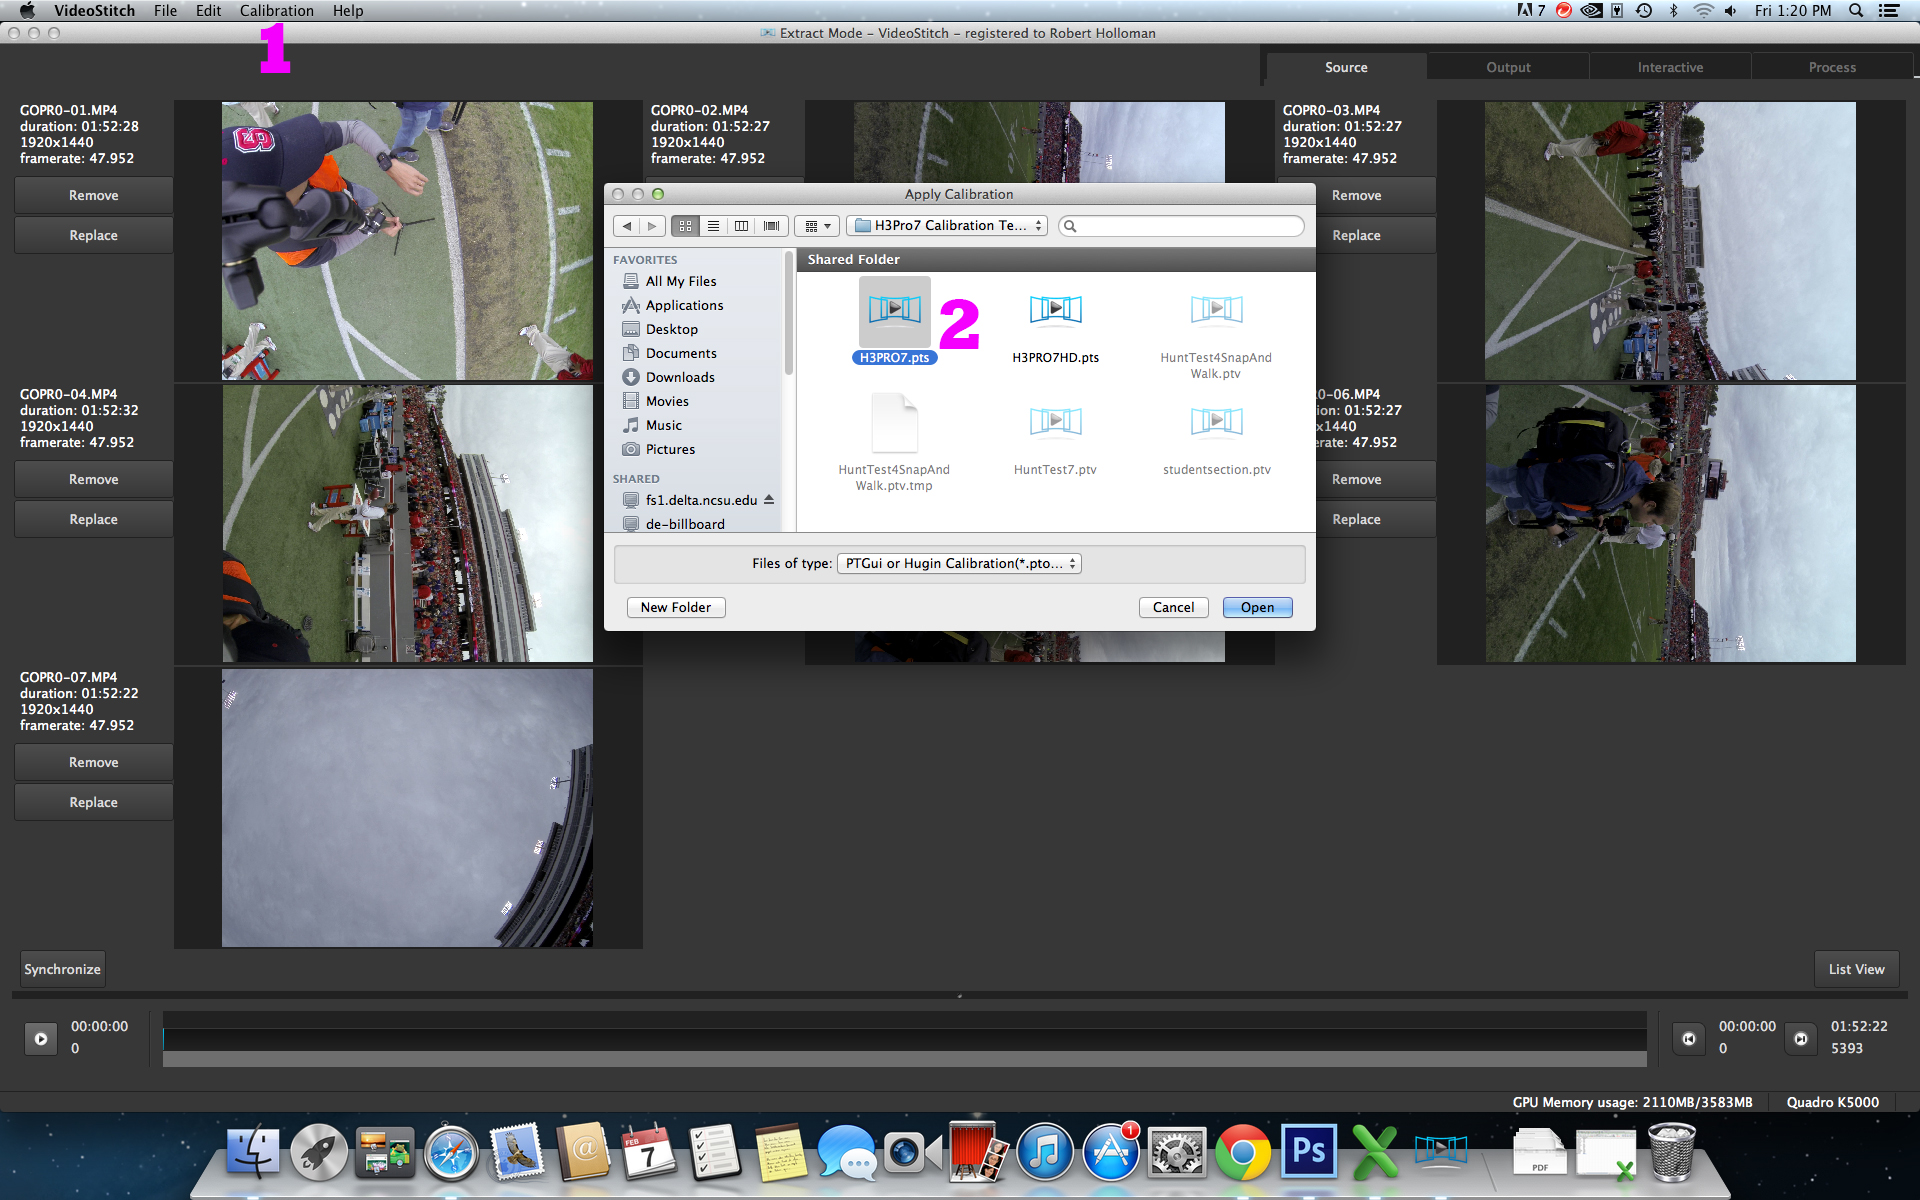
Apply Calibration
Double check the video is level in the output panel and test in the player to see if video will pan left and right. Next click the output process. Set the video at the output resolution you would like. If you need a video at a resolution over 4096, this video will have to be exported as tiffs and then the video created in another program.
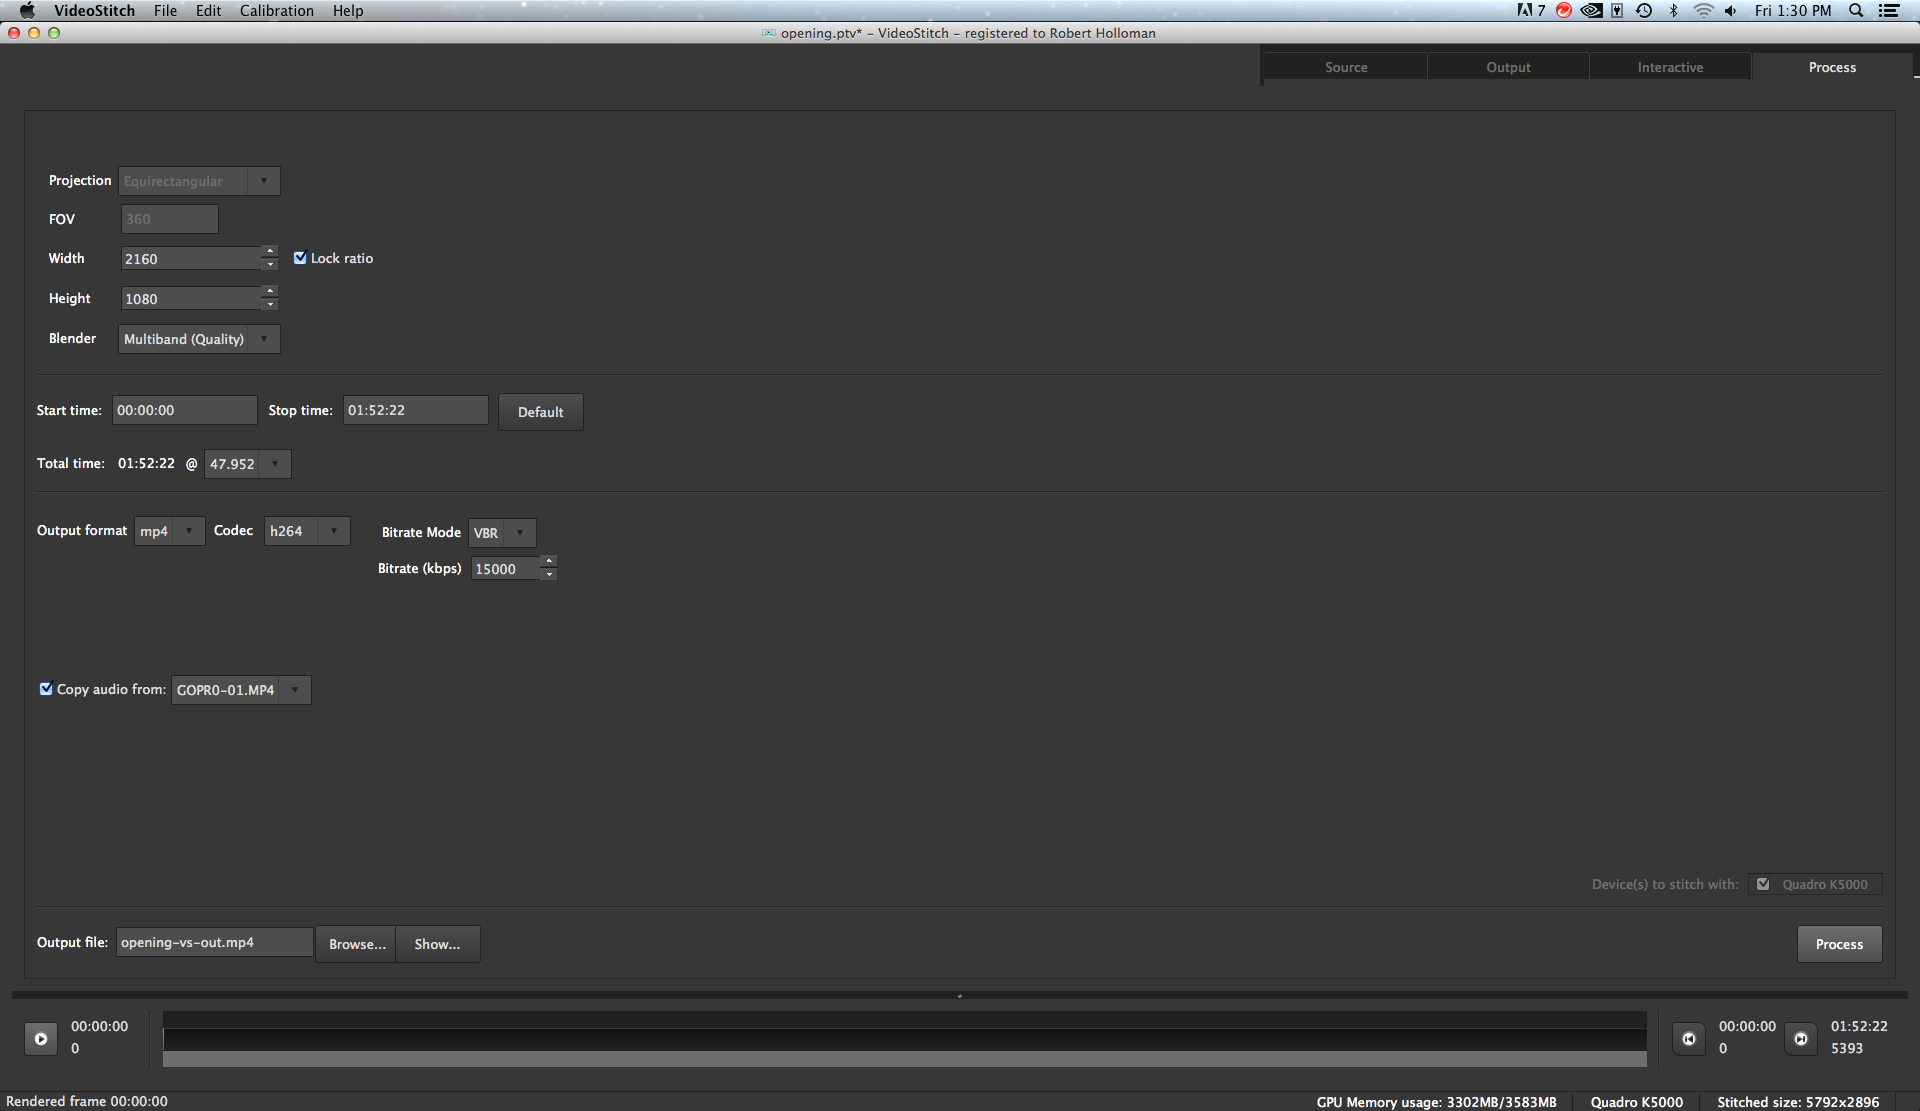
export settings
The horizon in the rendered video should now have a horizon which is relatively straight across the screen.
Autopano Video
Autopano video is another video stitch software. This software allows more flexibility in how it stitches video together. This software looks to be the preferred method when the camera is moving because it analyzes the clips and joins them. Where video stitch uses the template.
This example video shows how Autopano analyzes the video when stitching. This creates slight ghosting. However, I think the ghosting is preferred over large blocks moving about.
More information on Autopano workflow can be found here: